1
Open the side panel
Press the three dots on the oval handle. The keyhole end pops up. Pull that end up to release the panel, then lift the panel away and set it aside.
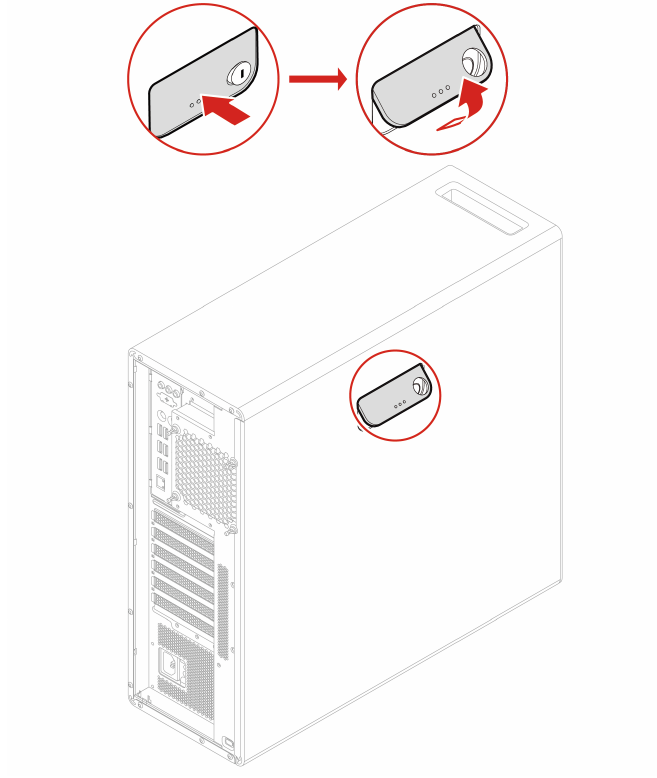
The oval latch on the side panel (Lenovo manual).
Loading the latest status…
ThinkStation P620 (the big black tower) · new part: Samsung 990 PRO 4TB · about 30–45 minutes
Press the three dots on the oval handle. The keyhole end pops up. Pull that end up to release the panel, then lift the panel away and set it aside.
The oval latch on the side panel (Lenovo manual).
Look near the middle of the board: below the memory sticks, next to the ends of the long card slots. You're looking for the area Chris circled. In the computer it's covered by a black or grey plastic air duct with a small fan, and under that a metal cooler with short fins.
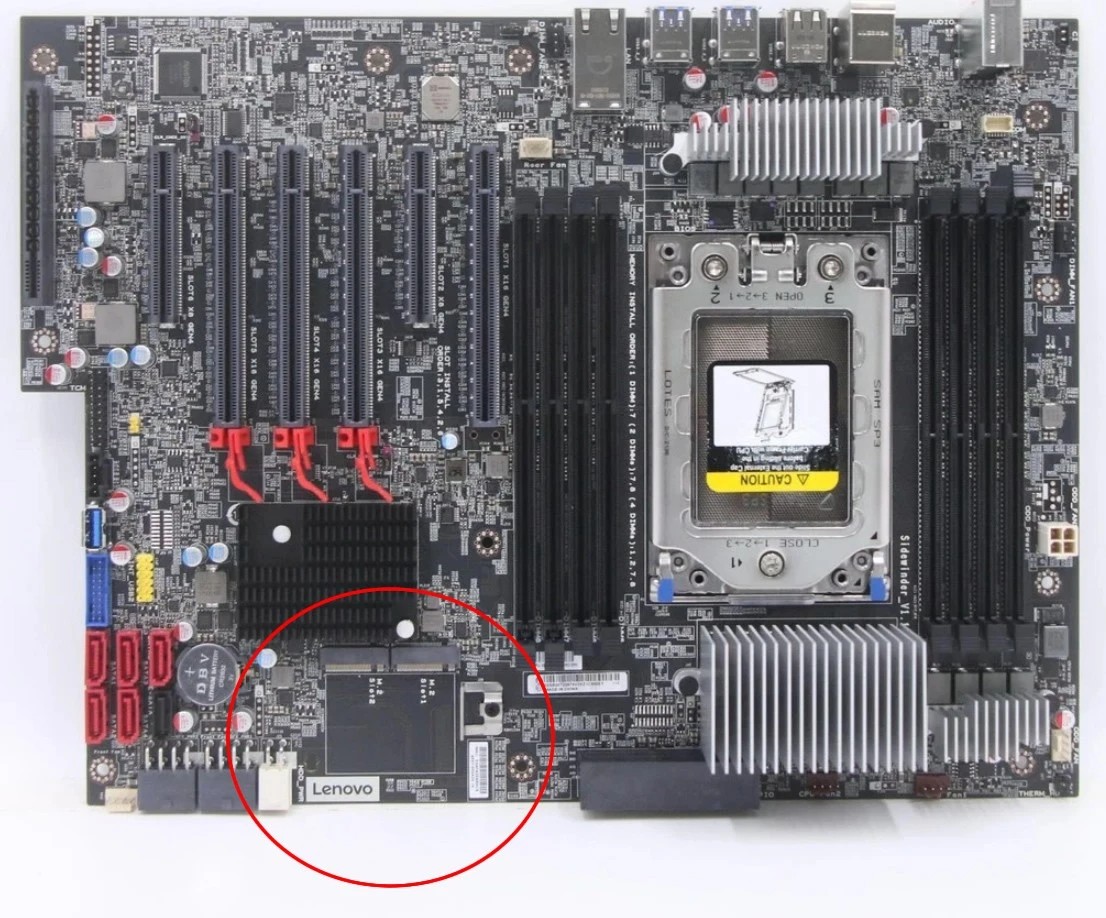
Chris's photo of the bare board, with the two SSD slots circled. In your computer this area is covered.
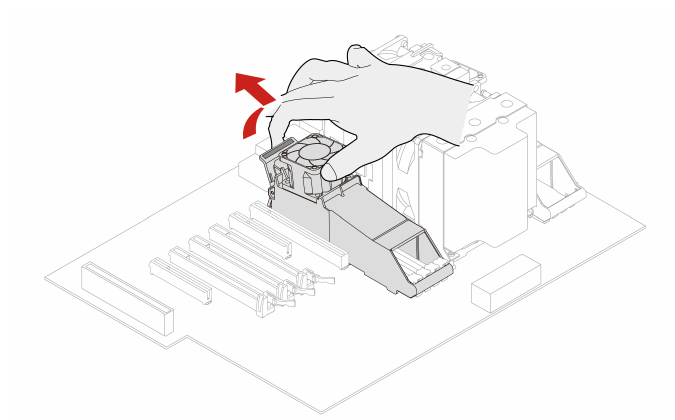
It's a plastic duct with a small fan on one end, sitting over the memory sticks. Lift the fan end straight up gently, then slide the duct out.
If a thin wire from the fan is still attached, don't pull it. Either lay the duct to the side with the wire still on, or take a photo and unplug the wire's small plug from the board. You'll plug it back in at the end.
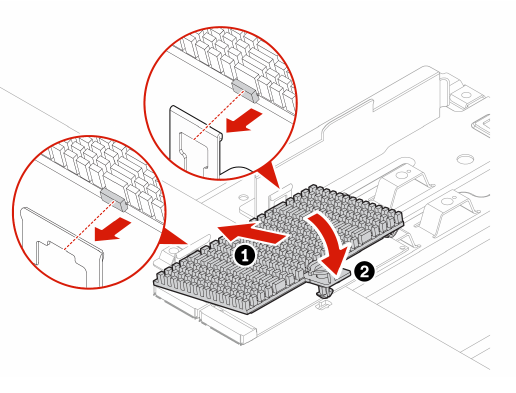
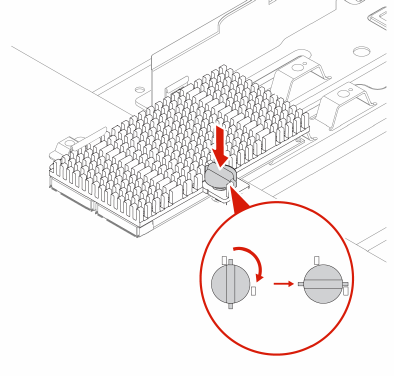
At one end of the finned cooler there's a round knob. Turn it a quarter turn to the left (counter-clockwise), by hand or with a flat screwdriver. Then lift that end up and slide the cooler out. The other end has two small hooks.
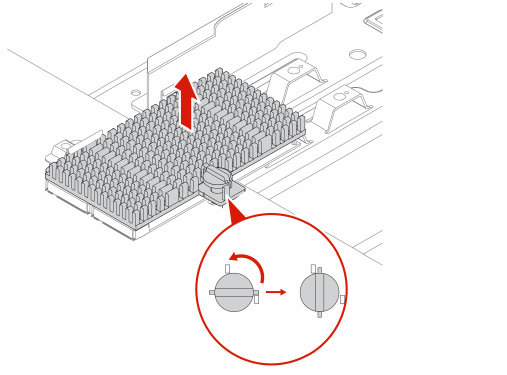
Put the cooler down upside down on the towel, so its soft pad underneath stays clean.
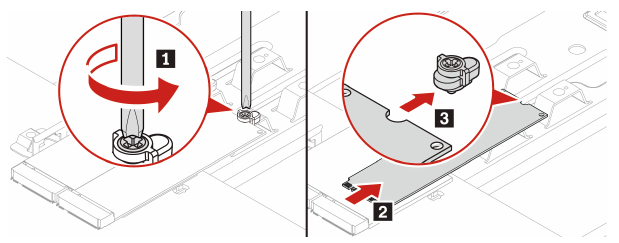
Under the cooler there are two slots side by side. One already holds an SSD. Leave it alone. The other slot is empty. At the far end of the empty slot there's a small screw in a little black plastic holder.
Unscrew it (turn left) and put the screw and its black holder in your bowl.
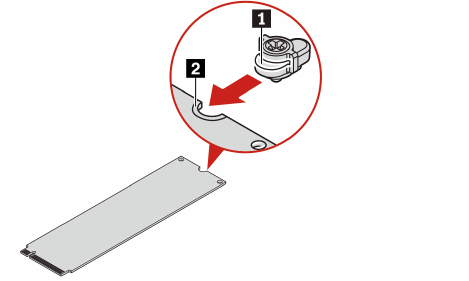
Take the SSD out of its box. Hold it by the edges only, and don't touch the gold teeth. Keep the sticker on; it belongs there.
The end of the SSD has a little half-moon notch. Slide the black holder (with its screw) onto that notch.
Sticker side up. Line up the gold teeth with the slot (the small gap in the teeth matches a small ridge in the slot). Slide it in at a slight angle, like a ramp, until it's firmly in. Then gently press the far end down flat.
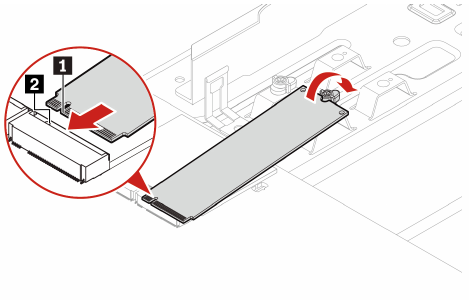
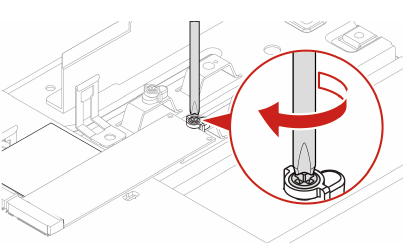
With the far end pressed flat, guide the black holder into its hole and turn the screw to the right until it stops turning easily. Don't force it.
Look at the soft pad on the underside of the cooler. If there's a clear plastic film on any part of it, peel the film off (only the film, not the pad).
Put the cooler back: hook its two small hooks into their holes first, then lay it down flat over both SSDs. Push the round knob down and turn it a quarter turn to the right (clockwise) to lock it.
Pictures: Lenovo ThinkStation P620 Hardware Maintenance Manual (M.2 solid-state drive; memory module cooler and duct; computer cover), and the photo from Chris, the builder.